Menu
Your cart is empty
Looks like you haven't added anything to your cart yet
TODAY TO JULY 5
Independence Day & Canada Day Sale
SAVE 20% ON
All Products
DISCOUNT EXPIRES IN 2 WEEKS!
LIMETED SALE! SAVE 20%!

LIMETED SALE! SAVE 20%!
Retaining Wall Tieback Anchors Using Deck Foot Anchor™ Parts
“Hello, please watch this video. This is a great retaining wall tieback anchor system."
That's what Bill from Indian Beach, NC said to us in the first line of his email after using the 48" helical auger and eye nuts - which are some of the components that make up the Deck Foot Anchor system.
He was building a seawall retaining wall on a property in Indian Beach, NC.
A Really Bright Idea
It is always exciting to hear from smart people who find different ways to use some of our products in ways we never anticipated.
Now that can also work the other way too - which may not be good!
So we caution you, don't just use any of our products any old way you wish. They may not perform in the way you are expecting.
However, this looked like a pretty good idea. Well done, Bill.
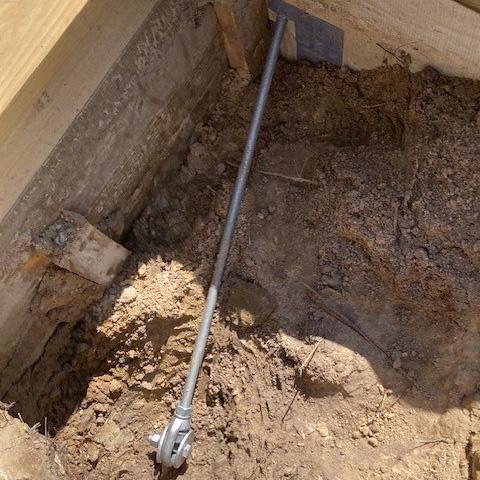
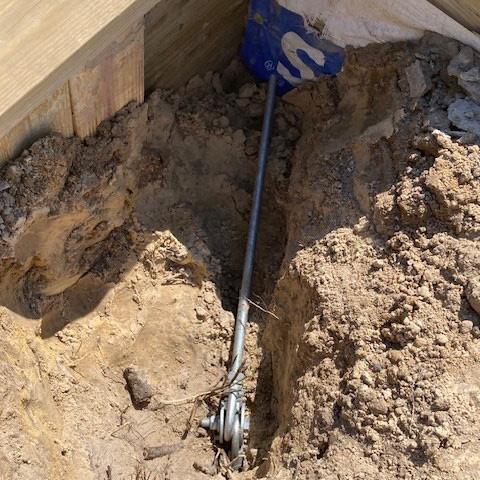
Bill has a lot of years of building experience.
And he immediately saw that he could drive a long 48" helical auger into his soil with his 20V cordless Kobalt ½" Impact Wrench. And then attach our Eye Nut to the drive end of the auger.
Then he could thread another Eye Nut to a threaded rod going through the wall and join the two together. Our Eye Nuts have a metric M16 2.0 (coarse) thread in case you are wondering.
Just connect the two pieces together and then from the outside of the retaining wall tighten the nut and washer to generate the desired tension and...
Voila!
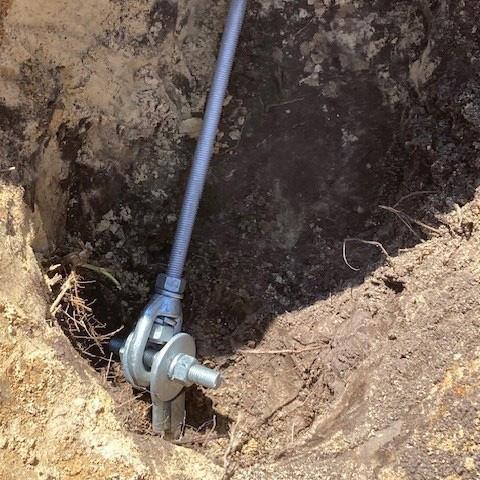
This close up shows a 3/4" diameter bolt locking both eye bolts together with large heavy flat washers and spring lock washers under each nut. It's a quick fix and strong.
Flat washers spread the compression load evenly around the Eye Nut. Lock washers prevent the nuts from loosening. And of course all this hardware is hot dip galvanized.
But we have a simpler modification that can improve on this even more.
How Most Retaining Walls Are Built
Deadman and Helical tieback anchors are two of the most common methods (although not the only means) of supporting retaining walls to resist hydrostatic pressure and soil load.
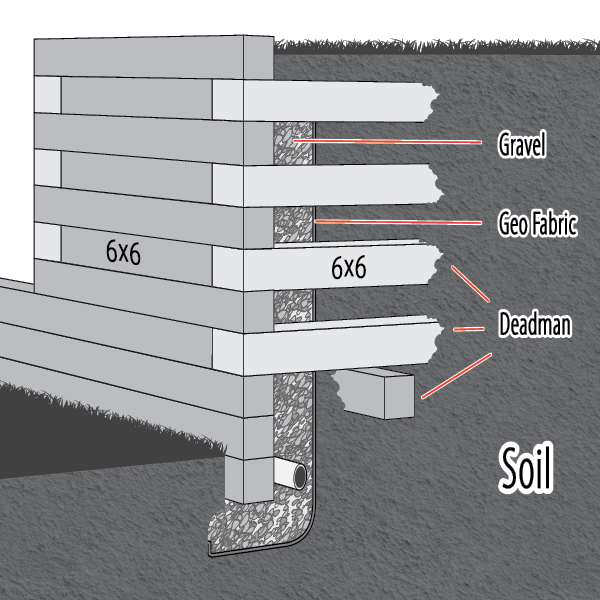
These illustrations show the difference between those two methods. The Deadman method is a tried and tested technique. But it is harder to build, requires more labor and excavation. Whereas, retaining wall Tieback Anchors can be installed with less effort and cost. They perform well but you must know your soil type and anchor deep enough to ensure its longevity.
Bill used a Tieback Anchor method so let's explain this method in a bit more detail.
How A Helical Tieback Anchor For A Retaining Wall Works
A Tieback Anchor functions most efficiently by resisting opposing tension forces - in a straight line.
If you are looking for a tieback anchor for a retaining wall, we suggest you consider our solution which brings together our Augers and a heavy duty Eye Nut and Coupling Plate Kit. It makes it easier to create a straight connection between the two joined parts.
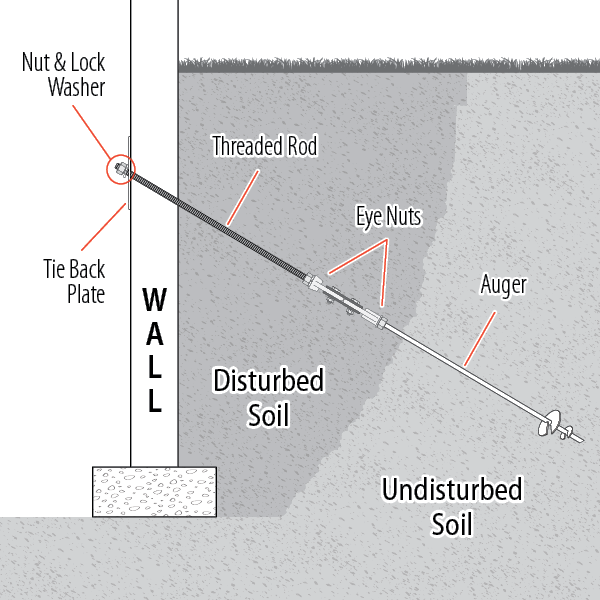
Once assembled, you create a linear load pathway that is anchored in the ground by the blade, joined to each other by coupling the Eye Nuts in a common horizontal plane and then tied to the retaining wall by a Cap Plate and Nut.
Ideally the assembled auger and rod should make a straight line to duplicate the path of the tension force as shown in this illustration.

Sometimes it is not possible to make a straight line. Staying within a maximum variance of 10° off of 180° will keep the moment load on the auger at a safe value. The more you increase the angle the weaker the system becomes because the forces may begin to pull the auger through the soil. You must consider a way to counteract that force. But nothing is as efficient as a straight load path.
Consider The Type Of Soil You Are Working With
You can see from Bill's photos that the soil was a compact sandy mix. So going as deep as you can would be wise in order to get the most tension resistance possible based on the auger blade diameter used. This particular auger used our 3-¼" diameter blade.
Vertical "pull out" tests in sandy soil in Colorado (see our Engineering Reports) showed a 36" deep auger with the 3-¼" diameter blade resisting a maximum of 4000 lbs versus 1,244 lbs in clay. If you are going into a softer clay, you should consider using our auger with a 5" diameter blade. which has been tested to 5,500#. So for safety, take half that value at 2000# for your design calculations you should be able to determine with some degree of confidence what your resistance in the wall is going to be.
We would highly recommend that you take our Engineering Report and discuss them with a structural engineer to fully understand and appreciate them so you use the product in the correct way for the correct application.
This is particularly important if you are building anything substantial.
The Tieback Anchor - A Better Solution
The Tieback Anchor uses this Eye Nut Coupling Kit which includes:
-
(2) Steel Plates
-
(2) ½" x 2" Bolts, Nuts, Lock Washers
-
(2) Eye Nuts (M16, coarse)
-
(2) M16 Nuts, Lock Washers
-
(1) 5" x 5" Cap Plate
Just select the Auger that best suits your application.
Then buy threaded rod locally in the lengths you need. Just make sure it is an M16 2.0 coarse pitch thread to match the Eye Nuts.
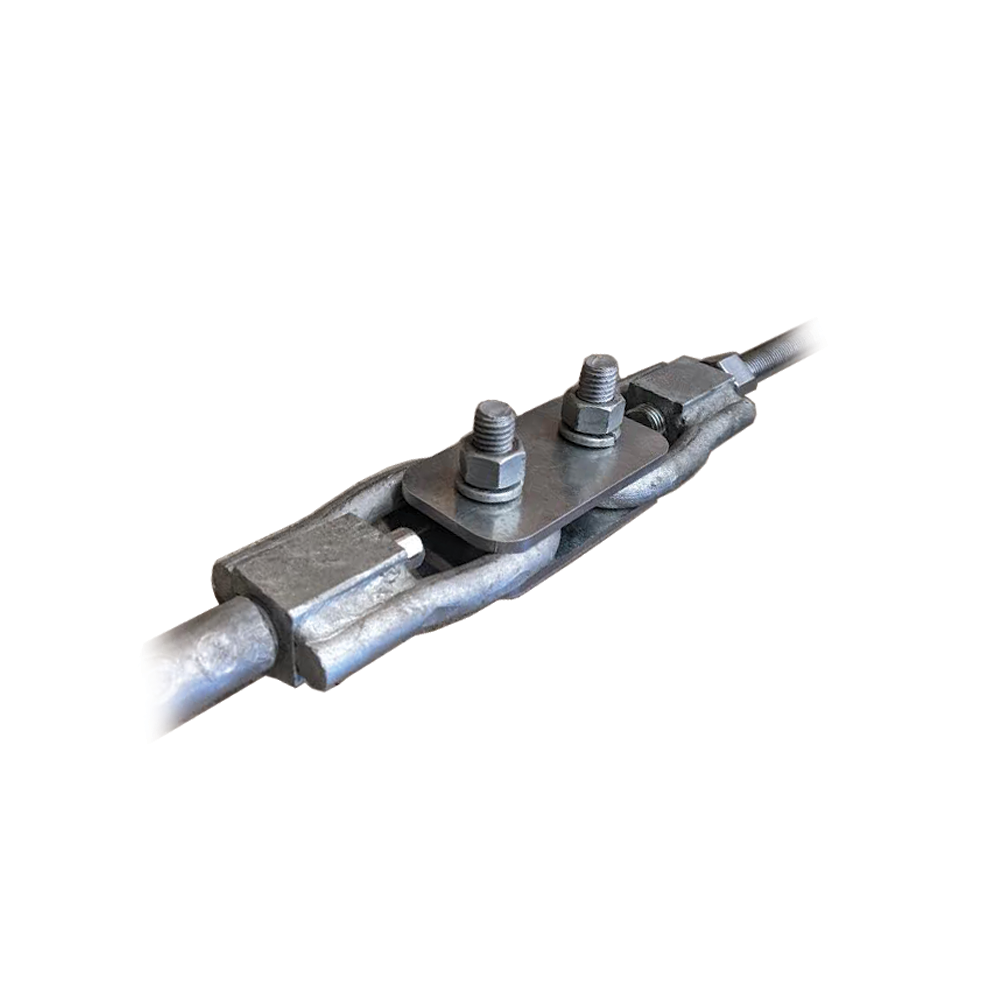
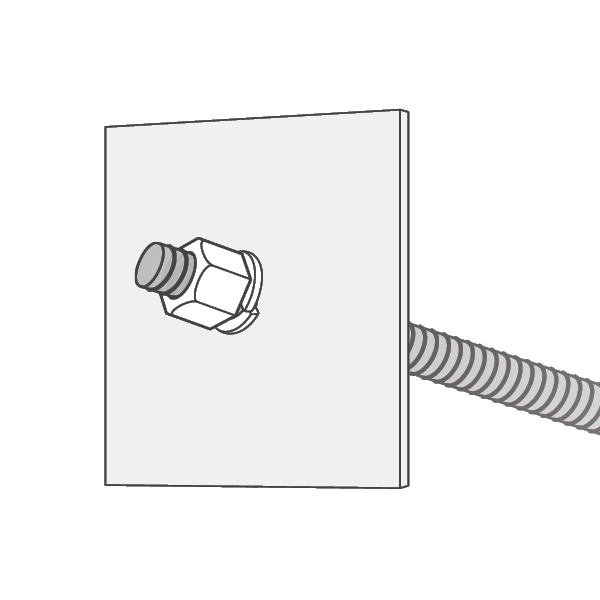
The Cap Plate (Flat) has a 17mm hole which can be enlarged on site if needed by using a drill bit depending on the angle that your threaded rod is at.
If you are building a retaining wall, and are looking for a great Tieback Anchor just order your Eye Nut Coupling Kit today by adding it to your cart below.
- Choosing a selection results in a full page refresh.
Follow us
© 2026, DecksGo Powered by Shopify


