Your cart is empty
Looks like you haven't added anything to your cart yet


Recommended for You
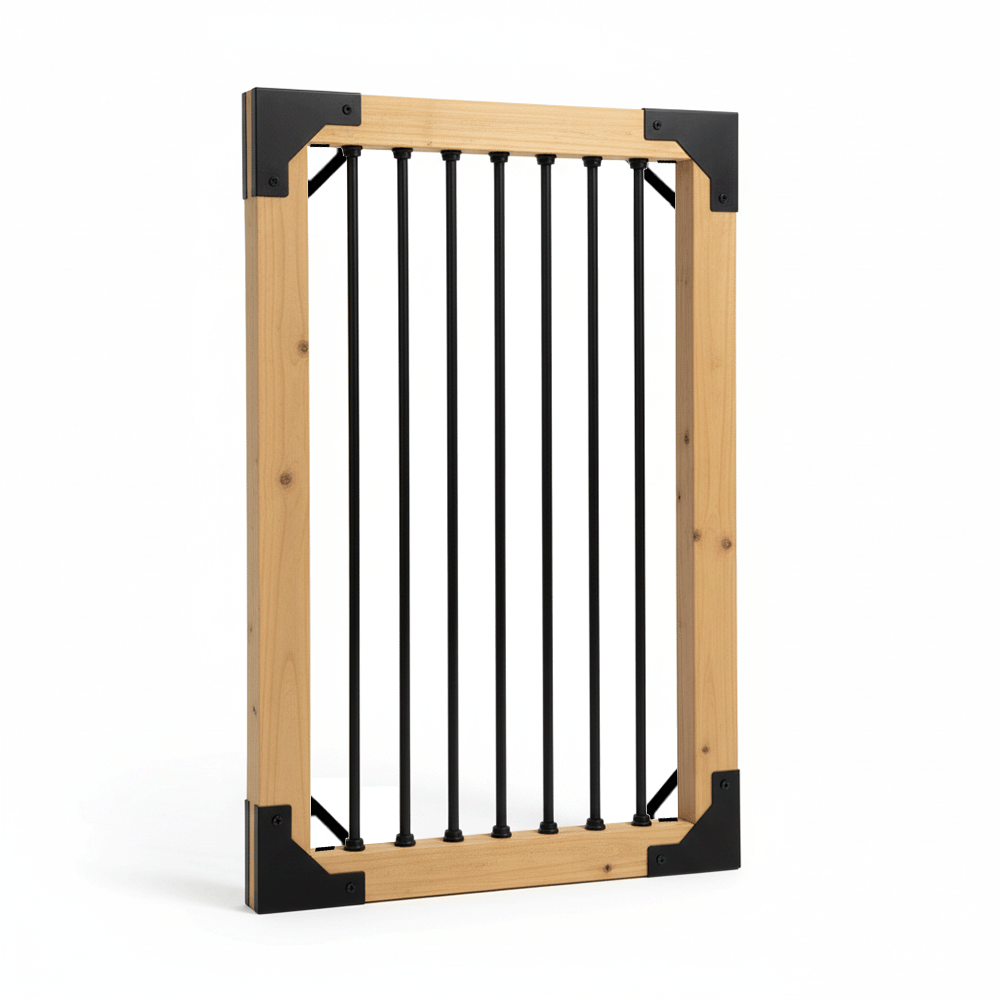
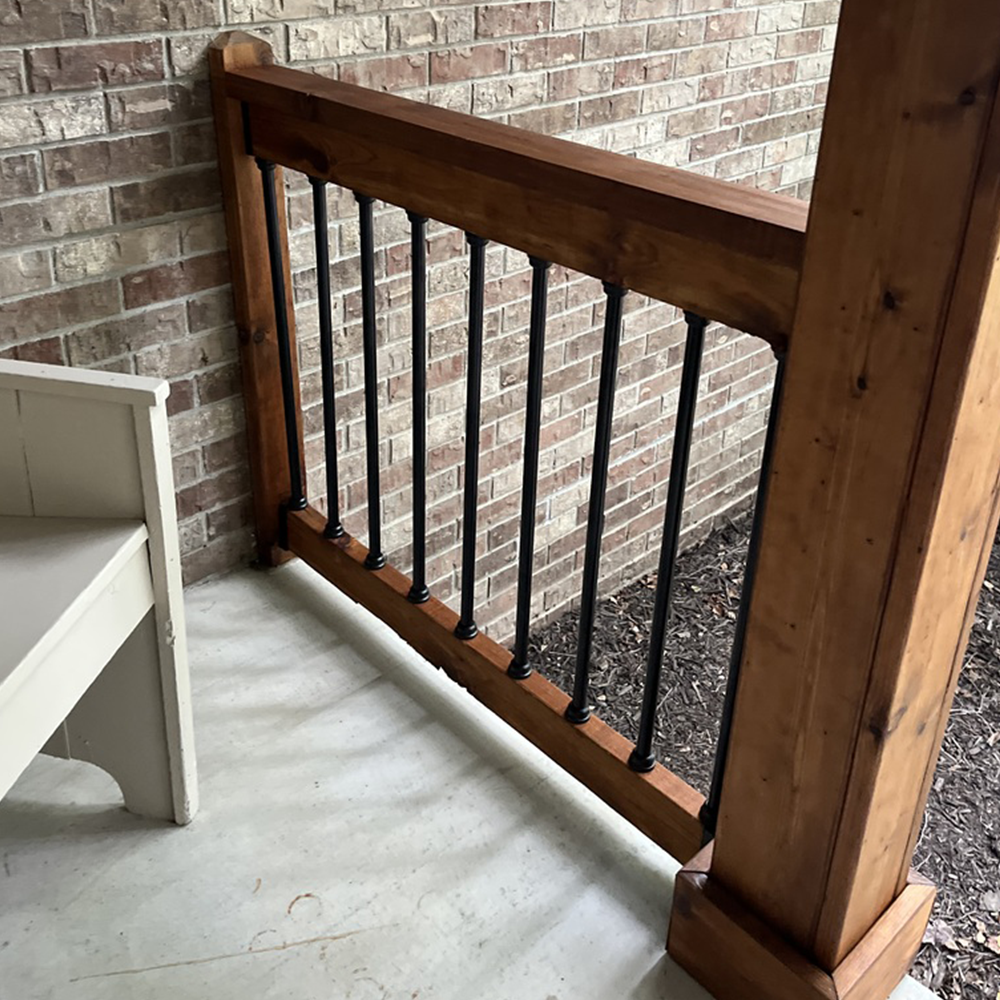
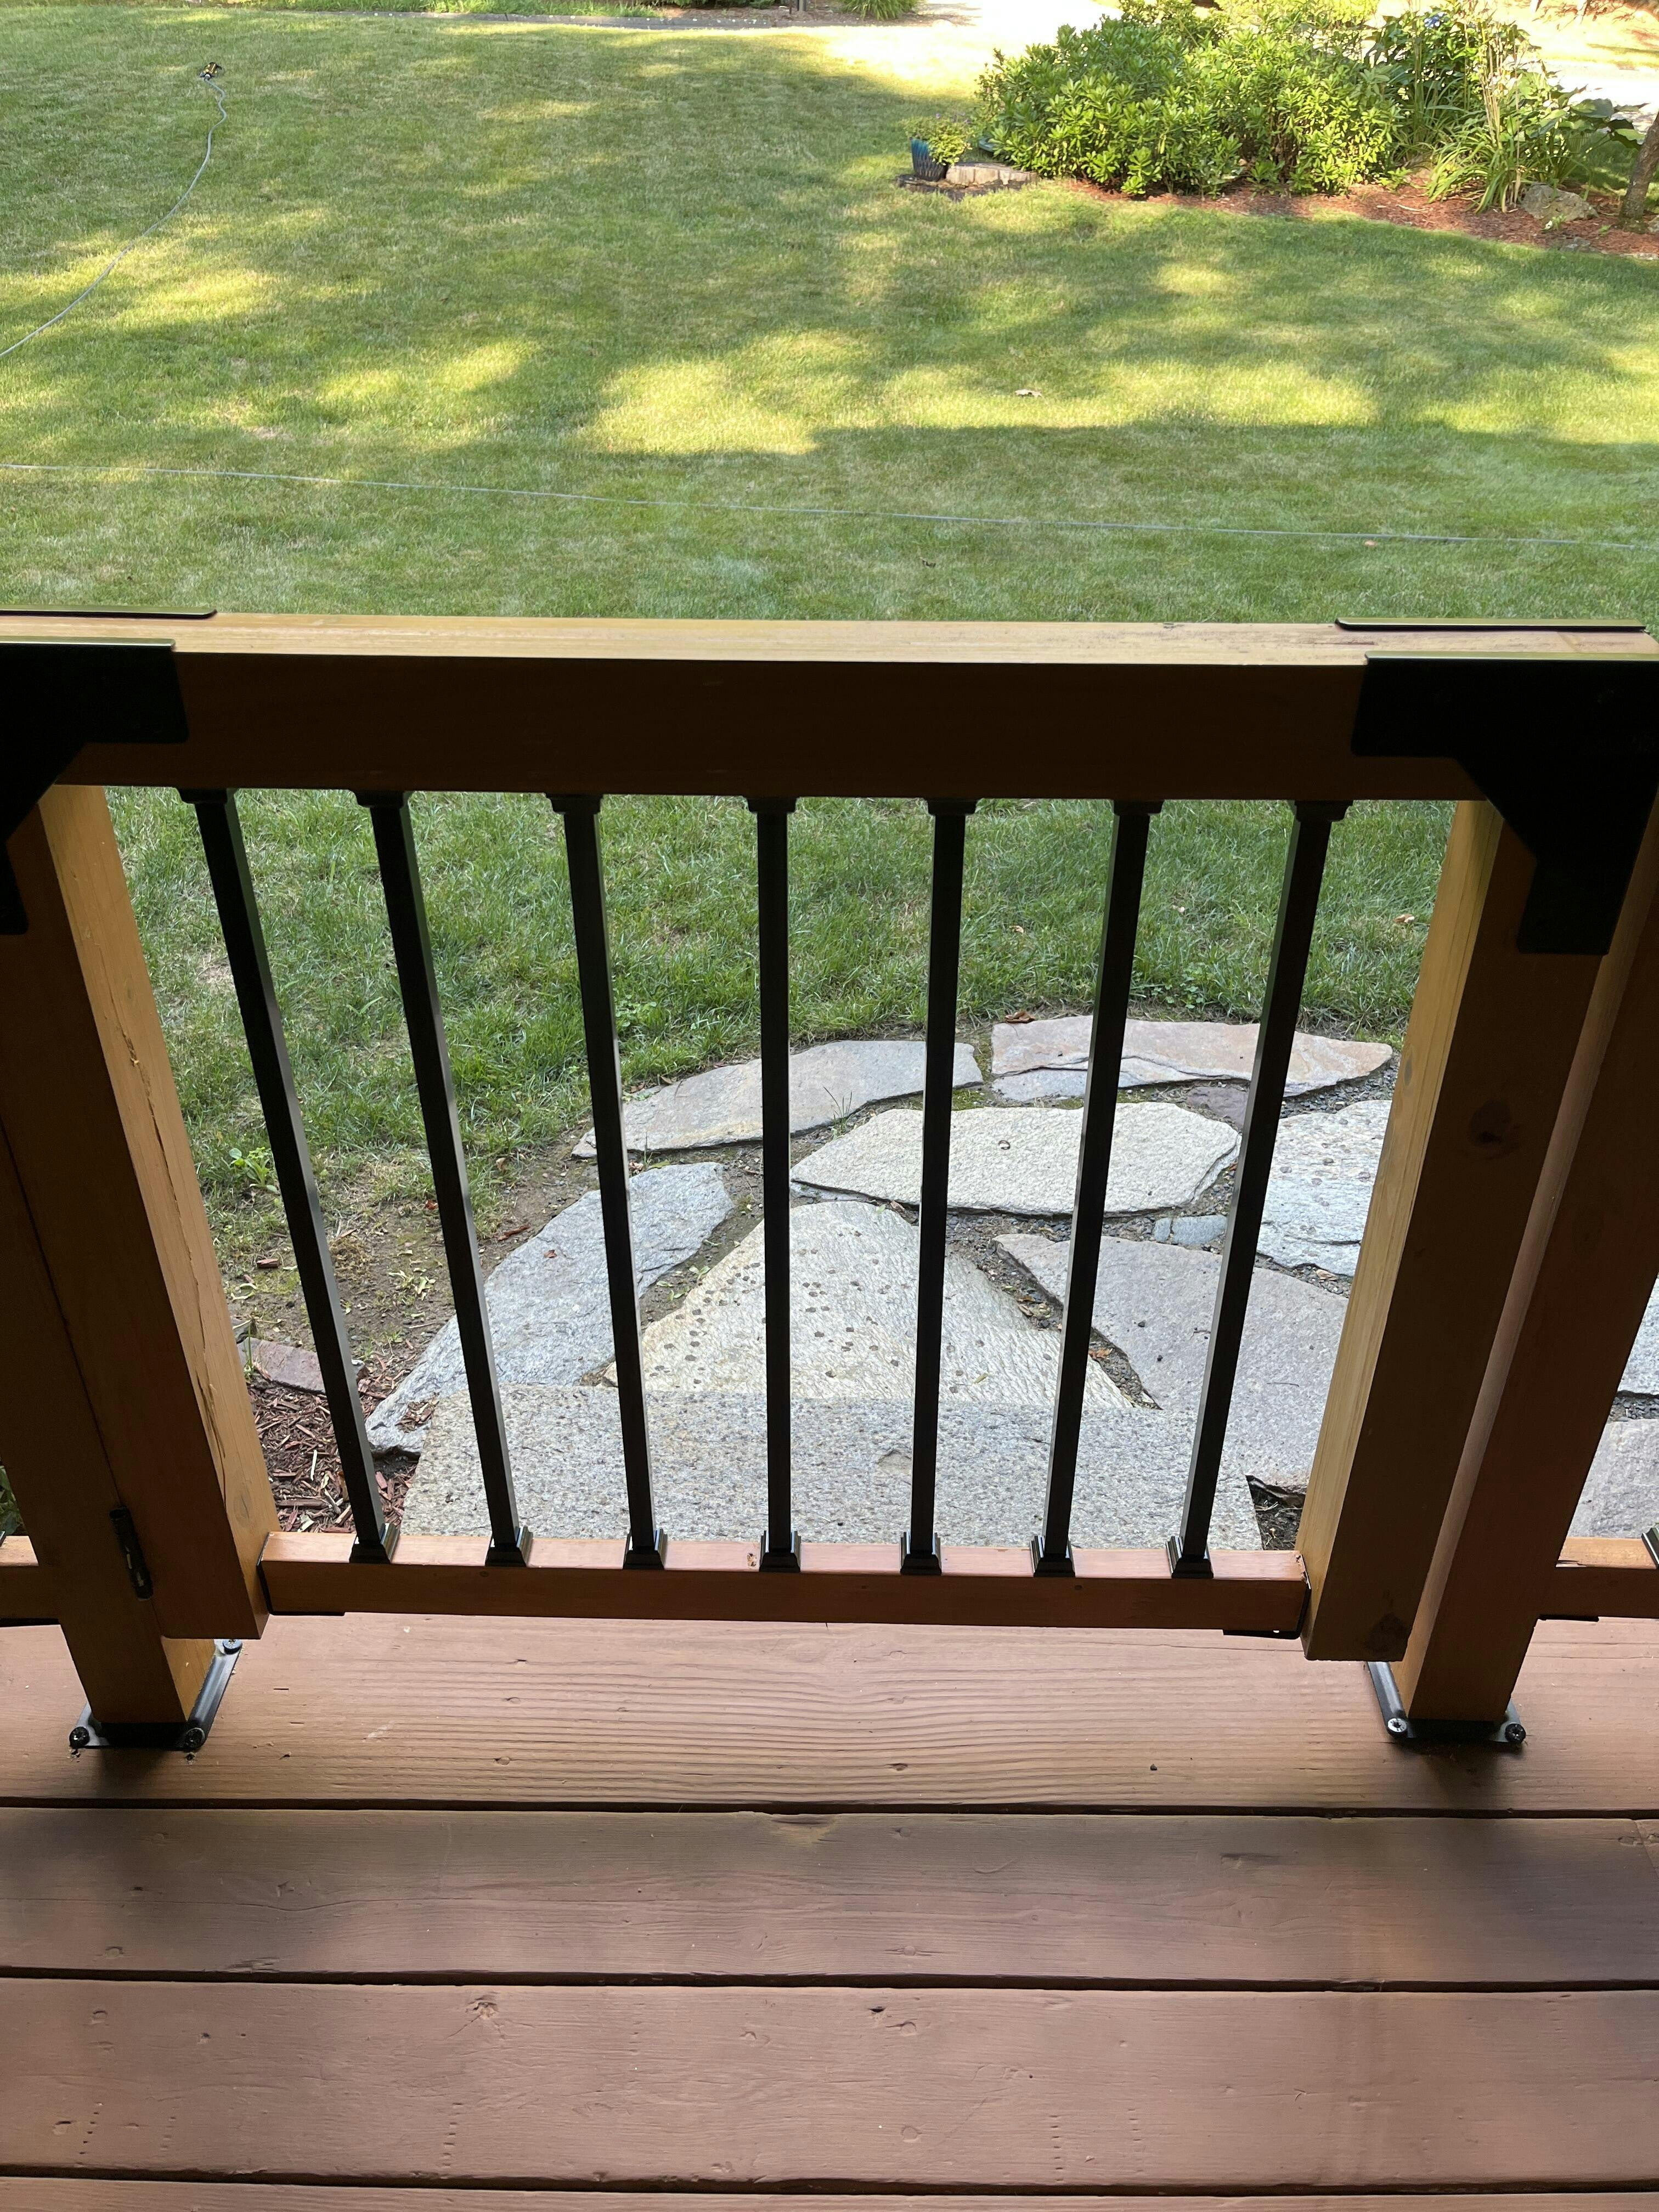
The Secret to Fast, Easy Railings...
The Snap’n Lock® Baluster System is fast and frustration-free.
Sideways installation means quick and easy baluster installation. Just screw, snap, lock, and you're done!


Why First & Long Time Builders Love Snap'n Lock
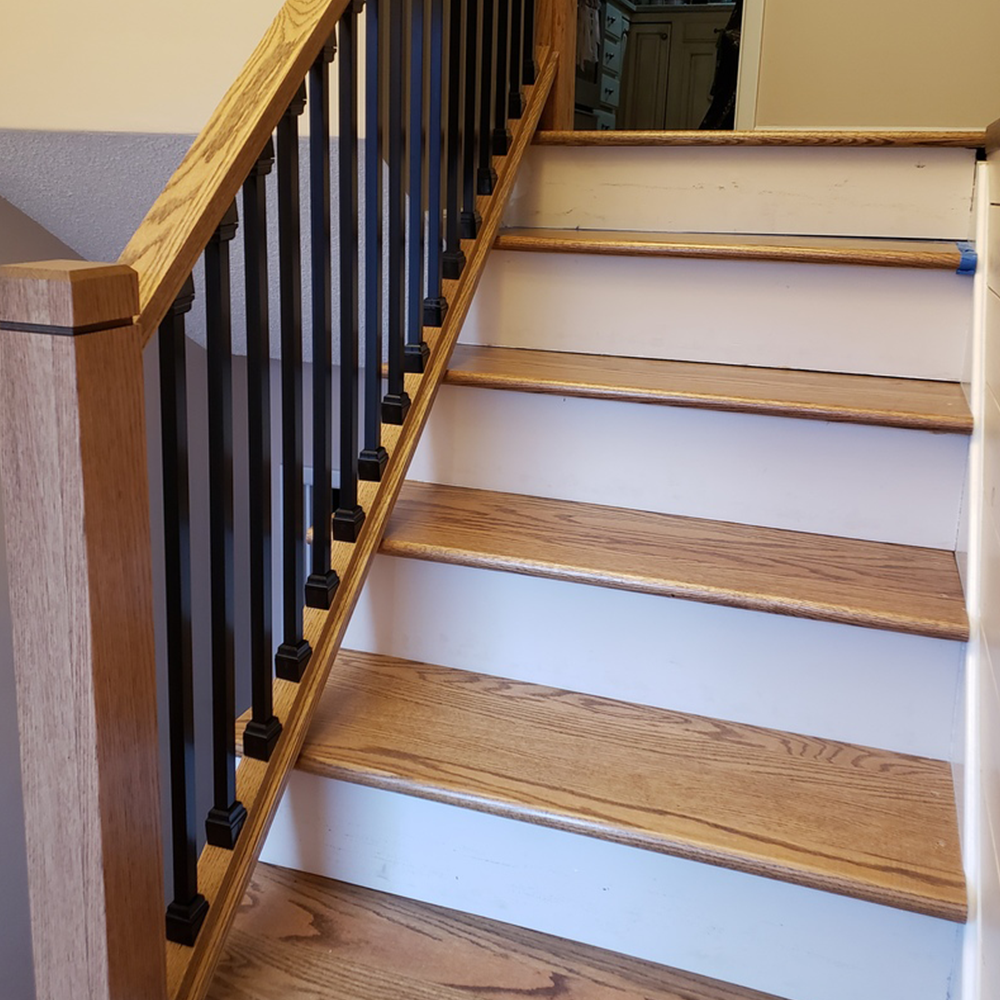
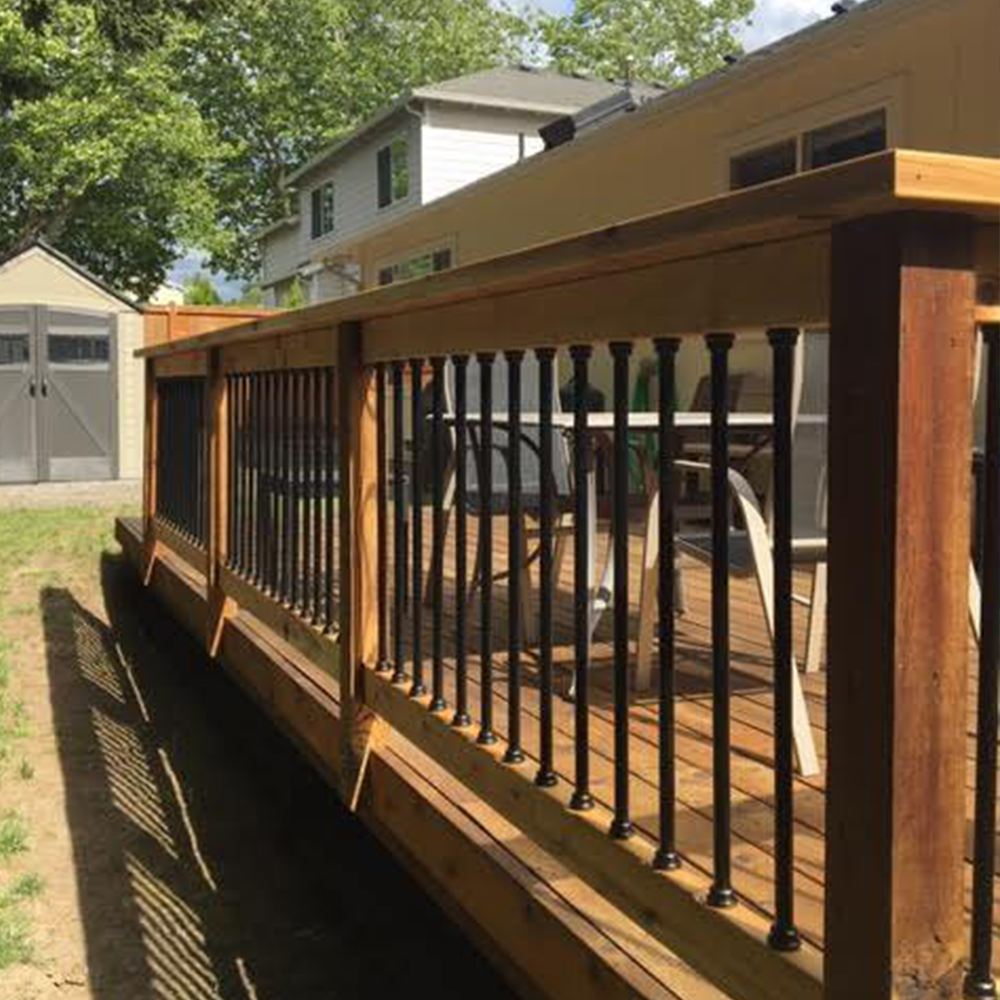
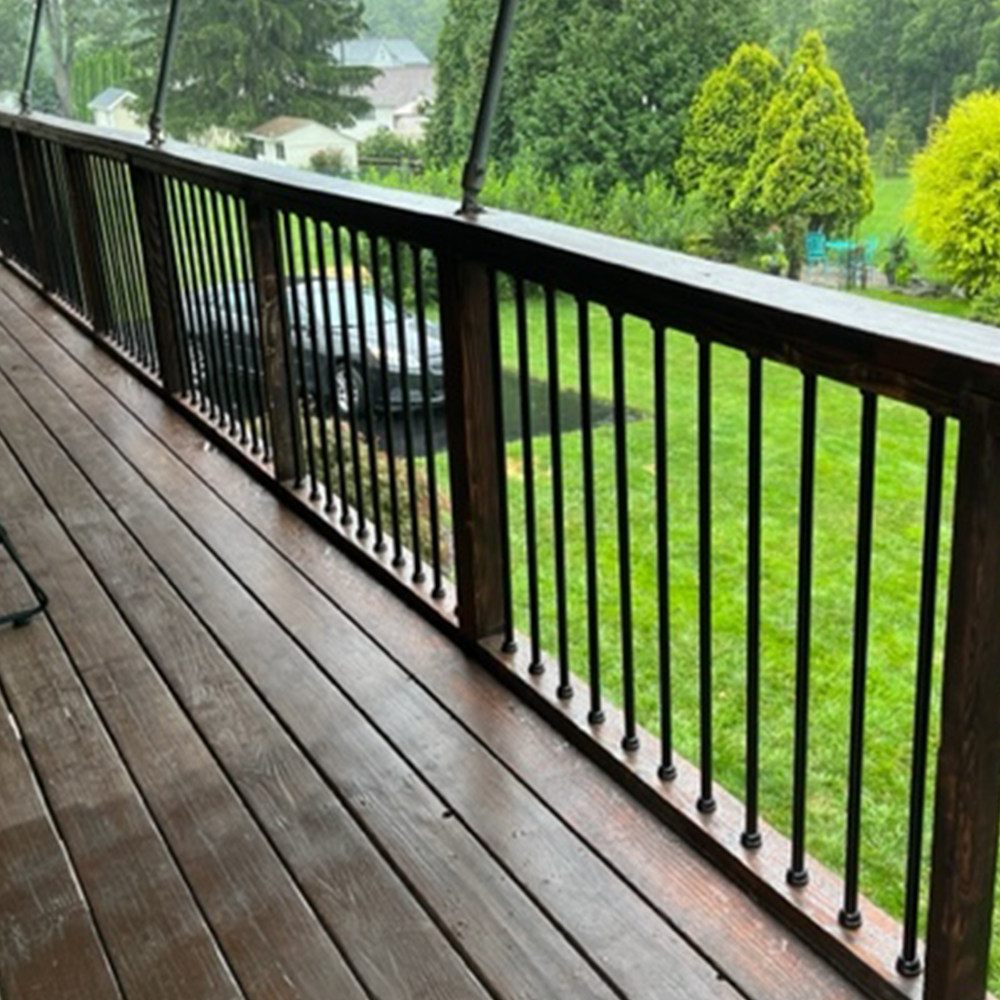
✔ Retrofit Old Railings Without Hassle – Replace outdated wood pickets without dismantling your railing.
✔ Built to Last – Premium T6063 aluminum balusters and durable USA-made polycarbonate connectors ensure long-lasting beauty.
✔ No Mess, No Stress Maintenance – Easily remove balusters for painting, staining, or future upgrades.
Additional Information
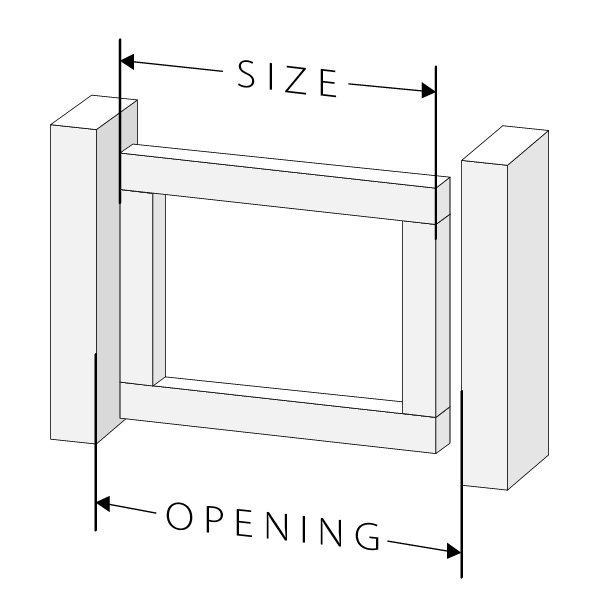
FIRST STEP: DETERMINE YOUR GATE SIZE
Determine the "Opening" size for your gate. Your gate width should be 1" less for proper clearance with hinges and a latch.
Refer to Step 4 on the instructions and the Table that shows a list of various opening sizes and the corresponding finished gates sizes.
Then cut your horizontal rails to "Size" width shown in the Table. Cut your vertical rails ½"longer than the actual length of the balusters in your kit.
The Snap'n Lock Connectors take up just under ½" so you need the side rails to be taller.
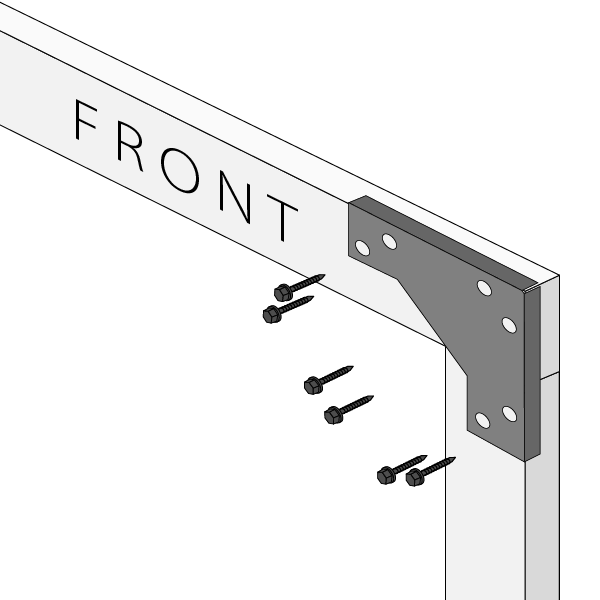
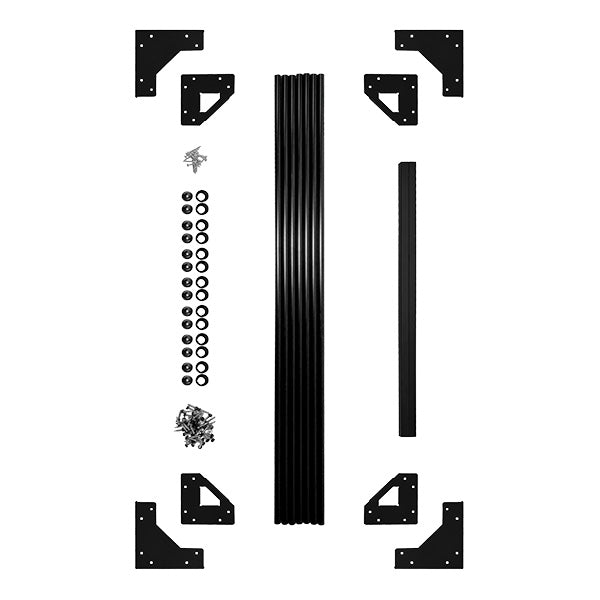
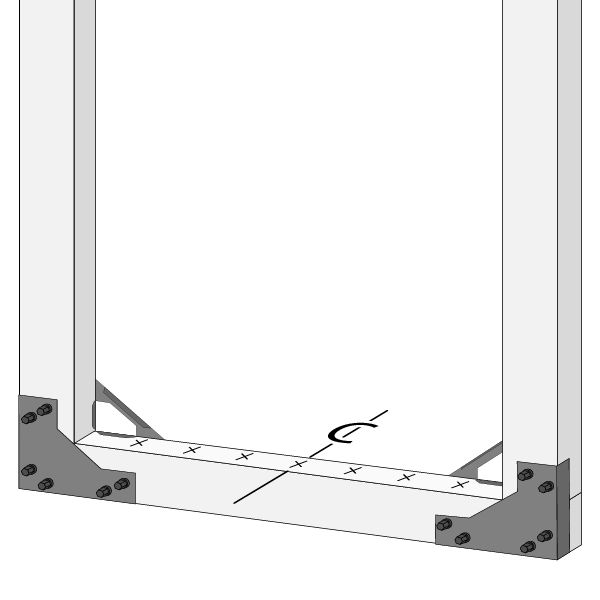
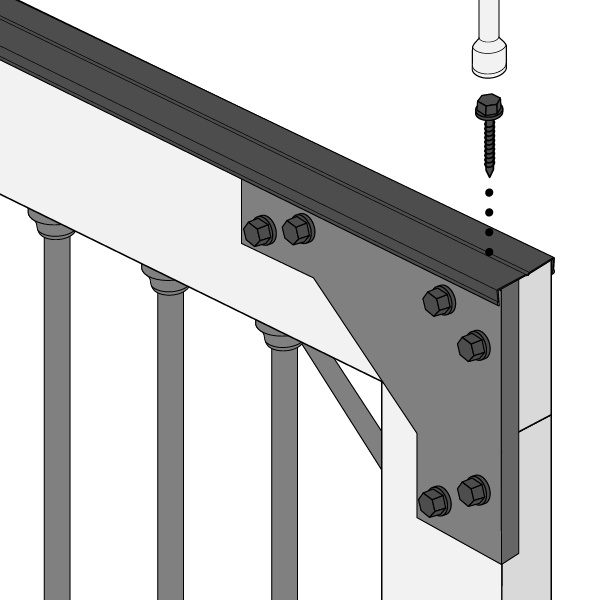
NEXT: ATTACH CORNER BRACKETS
Get set up on a nice flat workbench and layout your top and side rails as shown here. The horizontal rails should overlap the vertical rails.
Fit the front brackets snug around the 2x4 corner rails and drive in the screws using a socket driver.
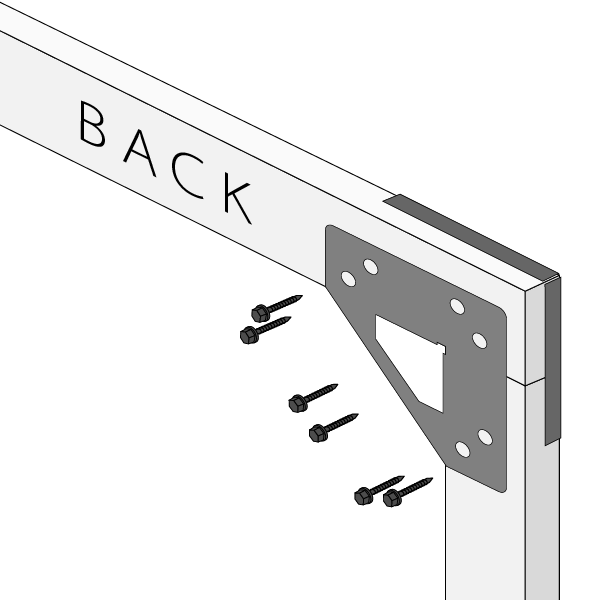
Flip the gate assembly over and now fit the rear corner brackets sung against the inside corner of the rails and drive in the screws.
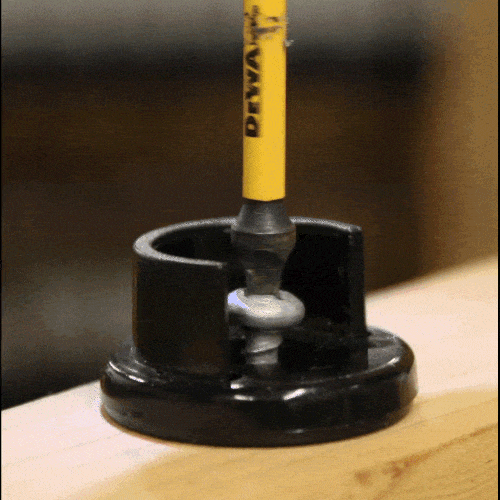
MARK BALUSTER INTERVALS
This is the most important part. Measure and mark center on the horizontal rails.
Then refer to the Table in Step 4 and measure out and mark the intervals for the balusters based on the "Size" of the gate you are building.
You have seven balusters. So one will sit in the center and three will sit to the left and right side of the center baluster.
The interval table makes it easy and will balance everything out nicely.
THE LAST STEP
Now snap or click - however you like to say it - all the baluster in place and lock down the collars to secure everything in place.
To make your Snap n Lock Gate virtually maintenance free, measure and cut the Rail Shield™ cover strip to the correct length.
Set your screw gun to a medium to low torque and drive a screw at each end of the gate, about 3/4" from the end of the gate.
There is no need to drive the screw down so hard as to deform the Rail Shield™. Just drive it far enough that is sits flush with the top surface.
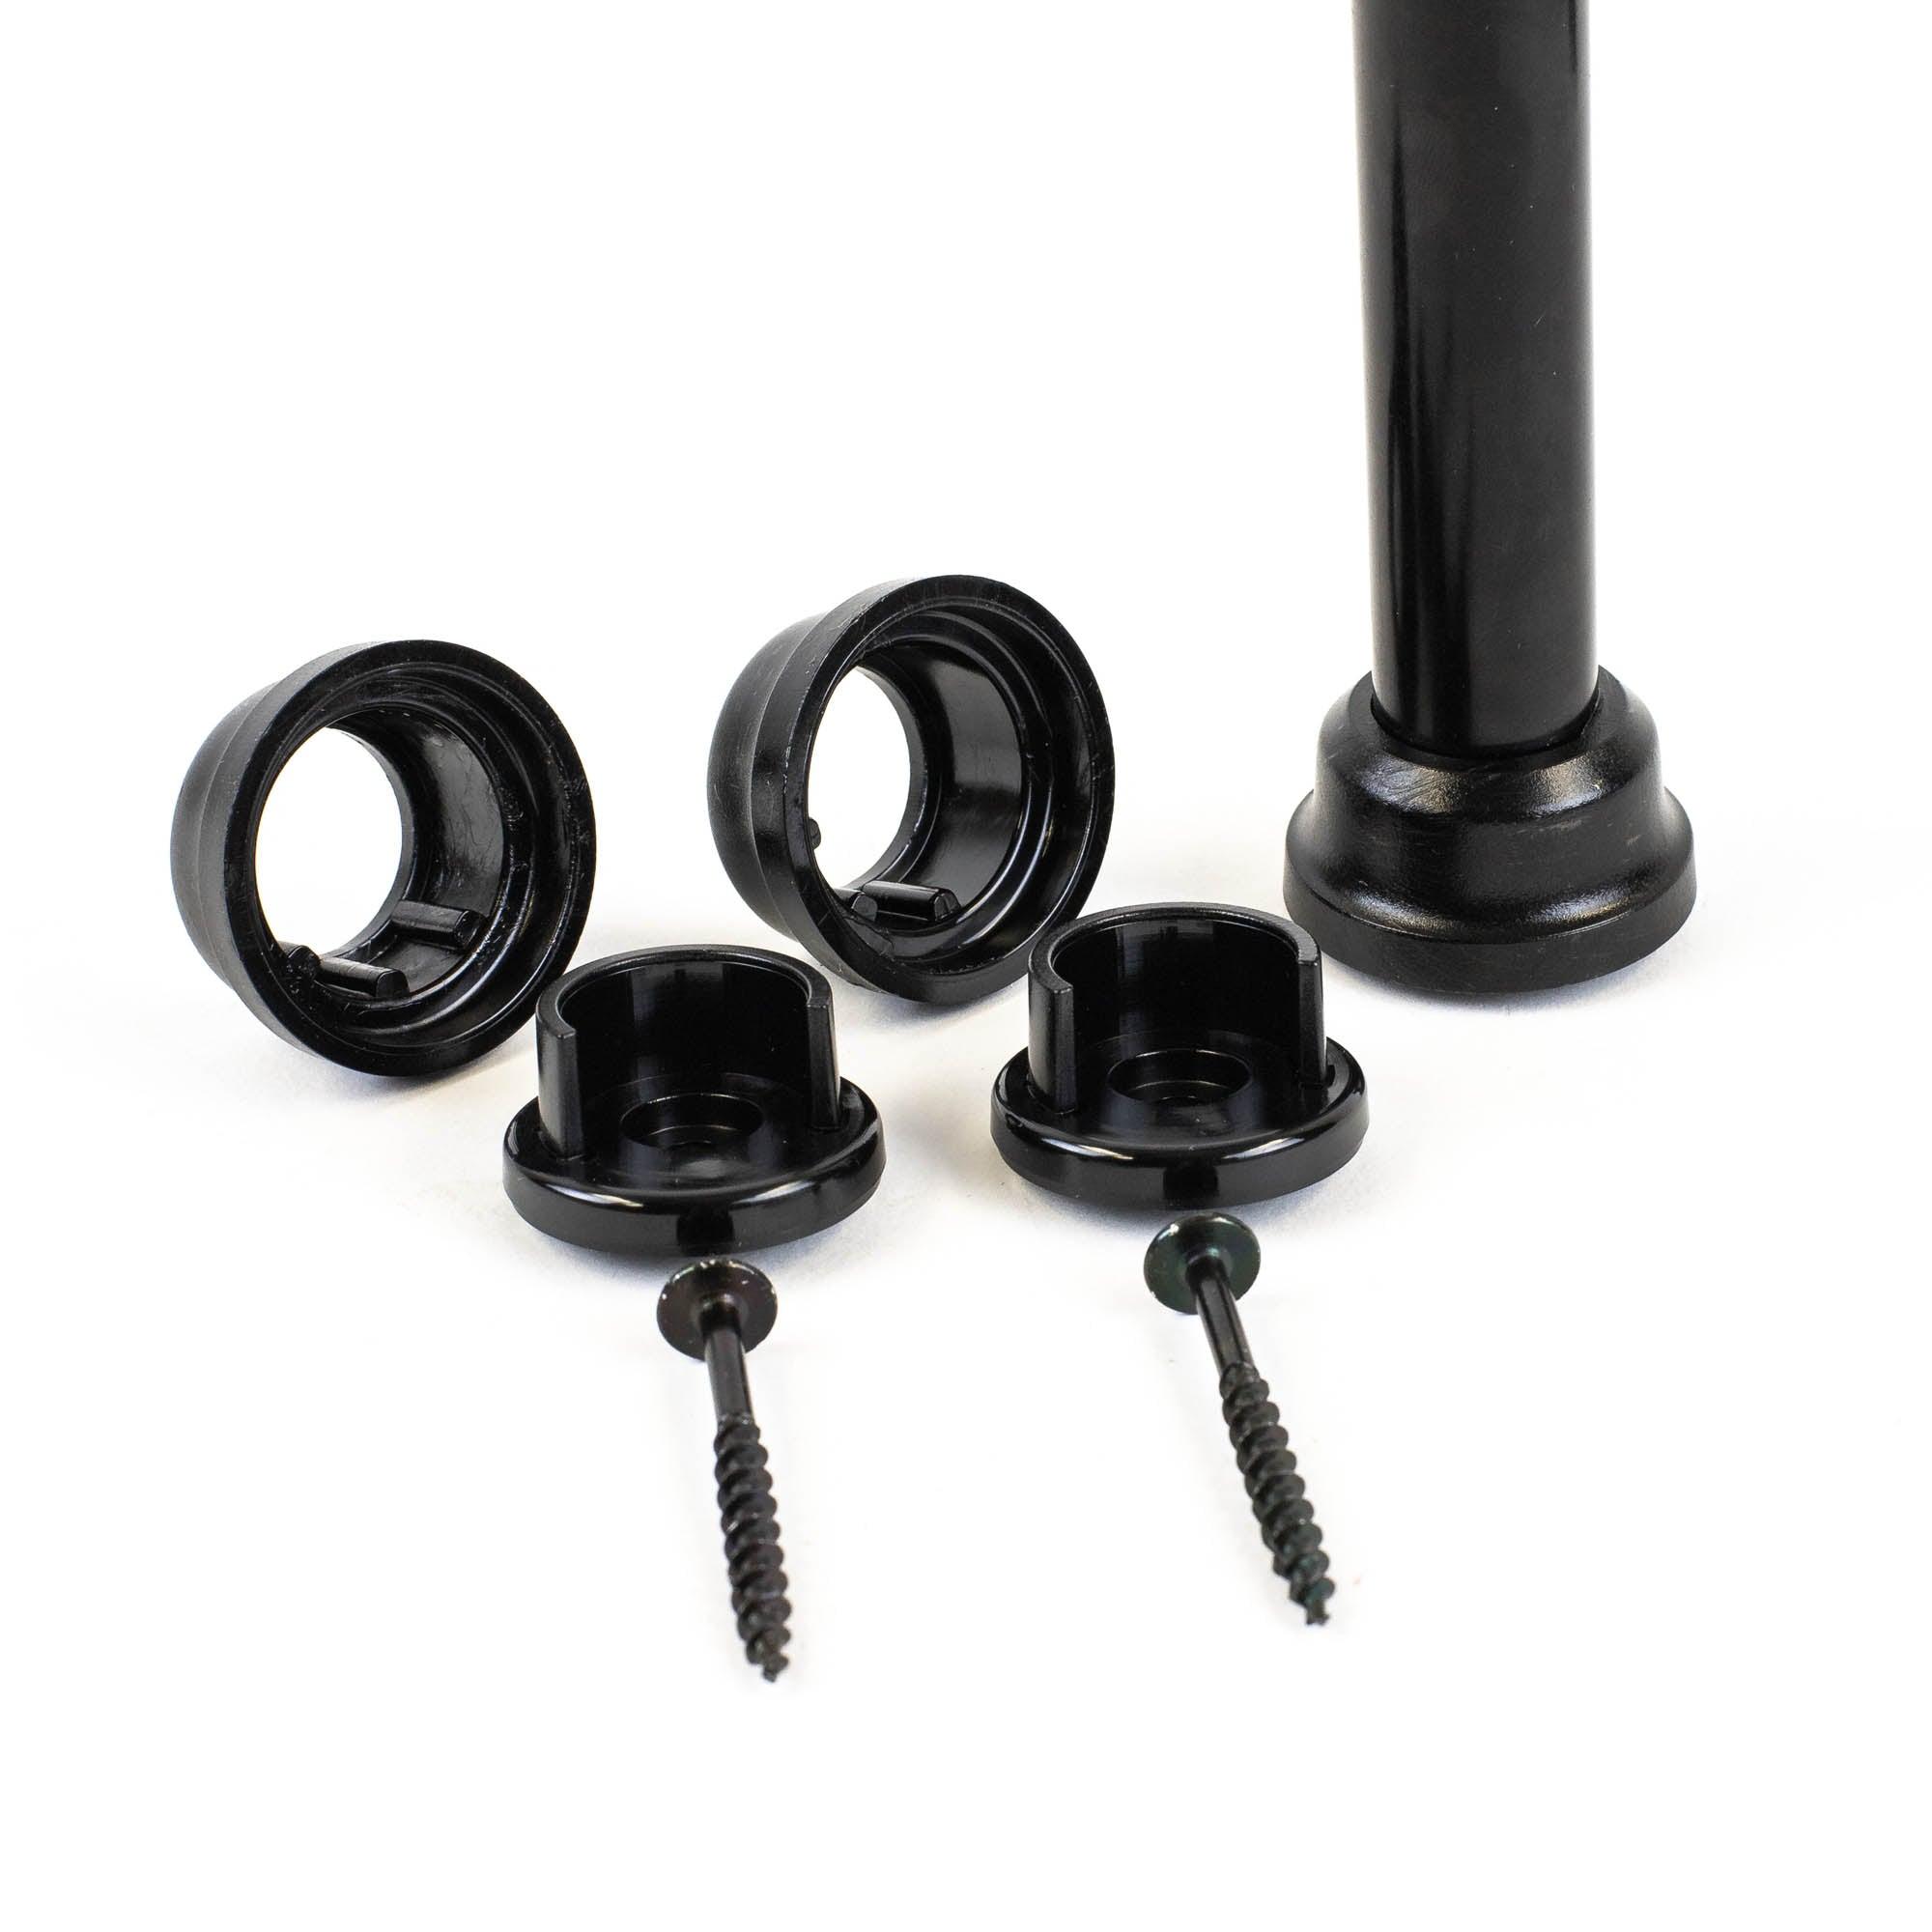
Do not let the simple look of the Snap 'n Lock™ Balusters fool you. A lot of thought went into conceiving this design in order to make it work so well. The base and the collar are designed to incredibly tight tolerances so they fit together like a glove and constrict around the baluster to hold it tight eliminating any wobble.
The sidewalls of the base are free to flex and accept the baluster as it is pushed in place. The mating surfaces of the base and the collar are sloped so that as they slide together the fit gets tighter and tighter until they lock together once fully seated.
The parts can be released by fitting a slot screwdriver under the color and popping it up. This allows for easy maintenance or the addition of decorative baluster collars anytime after installation.
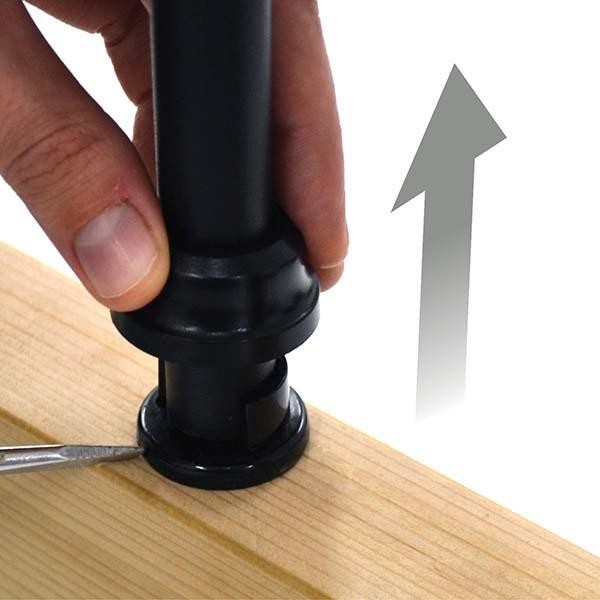
POP COLLAR UP
The collar releases using a slot screwdriver.
LOCK COLLAR DOWN
Just slide and lock the collar down when you are done.
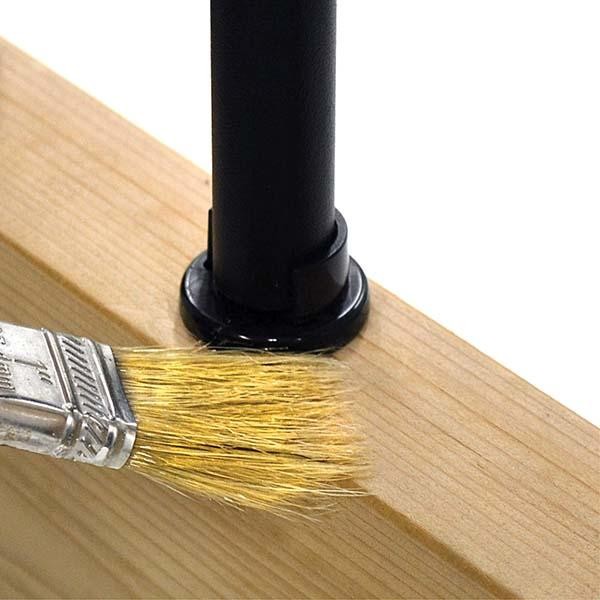
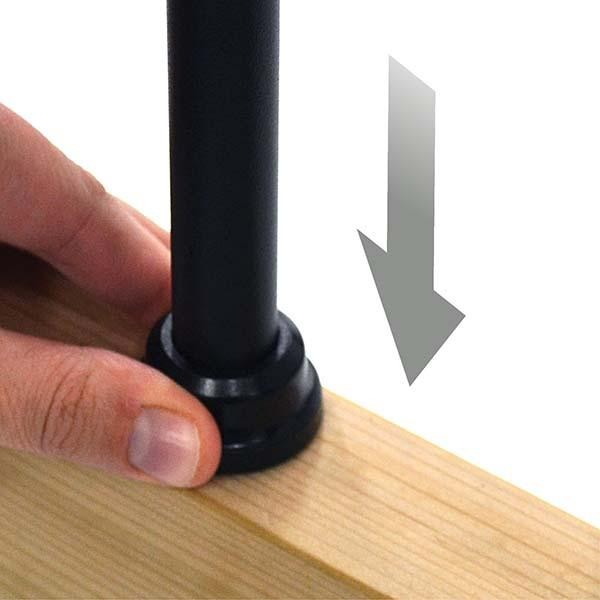
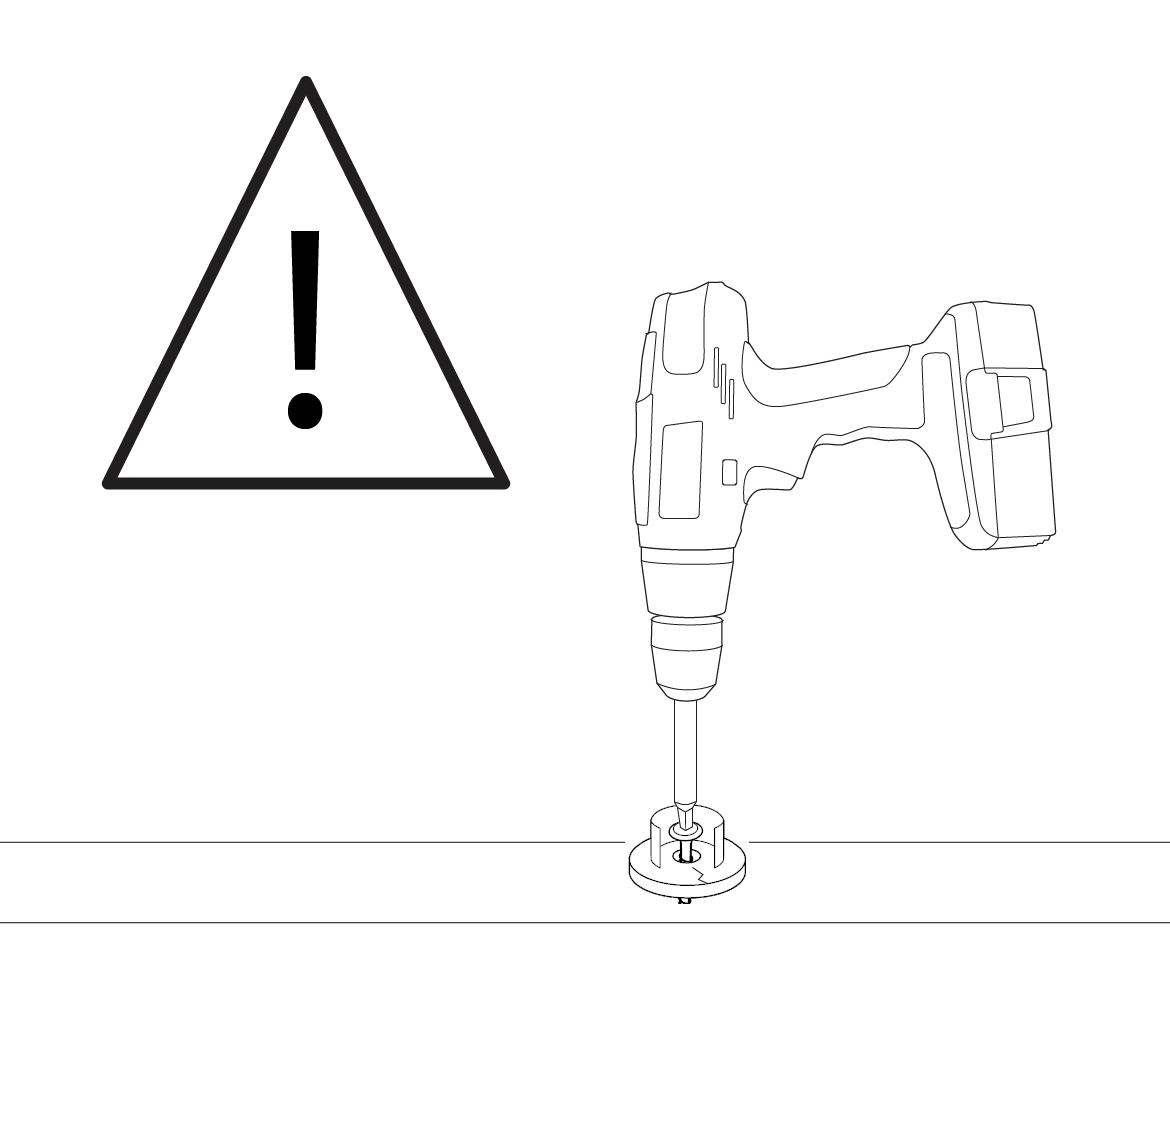
PLEASE FOLLOW THESE PRECAUTIONS WHEN FASTENING BALUSTER SADDLES
-
Do not use impact driver. Neither the screws or the connectors are designed for installation with an impact driver.
-
Use a variable speed screw driver and set torque to low-medium.
Overdriving screws into the connectors can damage the connector and reduce lifespan.
- Choosing a selection results in a full page refresh.